Imagine gazing out of your home’s windows, hoping to catch a stunning sunset or the first snowfall of the season, only to be met with the frustrating sight of streaks and grime obstructing your view. We’ve all been there, and it’s a scenario that can quickly diminish the beauty and comfort of our homes. At Freeflo Home Services, we understand the significance of clean windows in transforming your space into a haven of pristine elegance.
In this blog, we’re sharing a treasure trove of expert tips and tricks for mastering the art of Home Window Cleaning. Say goodbye to smudges and streaks as we guide you through the steps to make your windows sparkle and your home shine with newfound brilliance.
Gathering Your Supplies for Home Window Cleaning
When achieving spotless windows in your home, having the right tools at your disposal is half the battle. In this section, we’ll provide you with a comprehensive list of essential cleaning supplies for your Home Window Cleaning project, discuss why quality materials matter, and offer some handy tips on where to purchase these supplies if you still need them.
Essential Cleaning Supplies
1. Glass Cleaner: A good-quality glass cleaner is necessary for removing dirt, grime, and smudges from your windows. You can buy a commercial glass cleaner or make an effective DIY solution using vinegar and water.
2. Microfiber Cloths: Opt for lint-free microfiber cloths to ensure streak-free results. These are gentle on your windows while efficiently cleaning and drying them.
3. Squeegee: A squeegee is an essential tool for achieving a streak-free finish. It helps in removing excess cleaning solution and water from the glass efficiently.
4. Bucket: You’ll need a bucket to mix your cleaning solution and dip your tools, such as your scrubber and squeegee.
5. Scrubbing Tools: Invest in a scrubbing tool like a window scrubber or brush with soft bristles. This aids in loosening and removing stubborn dirt.
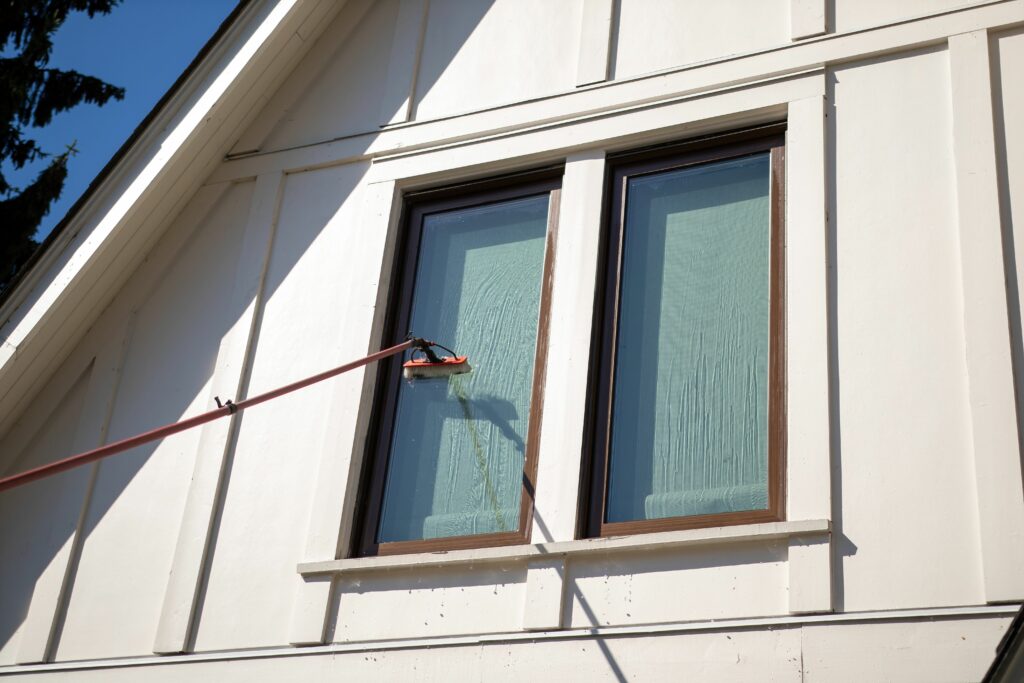
6. Extension Pole: An extension pole can be a lifesaver if you have high or hard-to-reach windows. It allows you to clean without the need for a ladder comfortably.
7. Razor Blades (with Handle): For those pesky spots, adhesive residue, or paint splatters, a razor blade can be handy when used carefully.
The Importance of Quality Materials
Quality matters when it comes to Home Window Cleaning. Cheap and subpar cleaning supplies can leave streaks and lint or even damage your windows. Investing in high-quality materials ensures that your cleaning process is efficient and that your windows remain pristine.
Quality microfiber cloths, for instance, won’t leave lint behind, and a well-made squeegee will provide a smooth, streak-free finish.
Preparing the Workspace
Regarding Home Window Cleaning, the old saying “an ounce of prevention is worth a pound of cure” couldn’t be more accurate. Before you roll up your sleeves and start tackling those windows, properly preparing the workspace is crucial. This step ensures your safety and contributes to a more efficient cleaning process.
The Importance of Workspace Preparation
The first key aspect is understanding why preparing the area around your windows is essential. This step must be revised to avoid unnecessary complications and potential damage. Dust, debris, or water runoff can enter your home without caution. Moreover, failing to prepare can slow down your progress, making the cleaning process more time-consuming than it needs to be.
Tips for Removing Obstacles and Protecting Surrounding Surfaces
Now that we’ve highlighted the significance of workspace preparation let’s dive into some practical tips to get you started:
1. Clear the Area: Begin by removing any obstacles near the windows. This includes indoor plants, furniture, or decorations. Creating a clutter-free zone will make it easier to access the windows and clean them thoroughly.
2. Lay Down Drop Cloths: To protect your indoor surfaces, lay down drop cloths or old towels beneath the windows. These will catch any water or cleaning solutions that might drip or splatter during cleaning, preventing potential stains or damage to your flooring.
3. Secure Curtains and Blinds: If your windows have curtains, blinds, or other coverings, pull them back and secure them away from the cleaning area. This prevents them from getting wet or stained during the process.
4. Protect Window Frames: Be mindful of wooden window frames, especially if you’re using liquid cleaning solutions. Consider applying a protective layer of masking or painter’s tape to the frame edges to prevent damage. This will help shield them from accidental spills or splashes.
5. Gather Your Tools: Before you begin, ensure all your cleaning tools and solutions are within easy reach. This includes your squeegee, microfiber cloths, bucket, and any specialized window cleaning solutions you plan to use.
Cleaning Techniques for Pristine Home Window Cleaning
When achieving spotless windows, the proper cleaning techniques can make all the difference. Whether tackling a single pane or an array of multi-paned windows, follow these step-by-step guidelines to ensure your windows gleam with clarity.
1. Wetting the Window: Begin by wetting the window thoroughly. You can use a bucket of soapy water or a specially formulated window cleaning solution. This initial step is crucial as it loosens dirt and grime, making removing it easier. Be sure to apply the solution generously, covering the entire surface of the window.
2. Scrubbing Away Dirt and Grime With your window wet, it’s time to tackle the accumulated dirt and grime. Use a soft-bristle brush or a window scrubber to agitate the surface gently. Start at the top and work your way down in a systematic fashion. Pay extra attention to any stubborn spots or built-up residue, as they may require extra elbow grease.
3. Rinsing and Squeegeeing: Once you’ve scrubbed away the dirt and grime, it’s time to rinse the window. A hose with a gentle spray attachment or a clean bucket of water will do the trick. Rinse thoroughly to ensure all soap and debris are removed.
Now, grab a high-quality squeegee and start at the top again. Pull the squeegee down in a straight line, wiping the blade with a clean, lint-free cloth after each pass. This technique prevents streaks from forming as you work across the entire window, overlapping your strokes slightly for the best results.
4. Drying and Polishing: To achieve that pristine, streak-free finish, use a microfiber cloth or a newspaper to dry and polish the window. Ensure you reach the edges and corners, leaving no moisture behind. This final step removes any remaining water spots and adds a sparkling shine to your home windows.

Safety Considerations When Handling Home Window Cleaning
Ensuring a sparkling result is essential for home window cleaning, but safety should always be the top priority. Whether tackling first-floor or upper-level windows, understanding and implementing proper safety measures is non-negotiable. This section will delve into crucial safety considerations every DIY window cleaner should know to avoid accidents and injuries.
Working at Heights or on Upper-Level Windows
Working on windows at heights poses inherent risks, so taking precautions is crucial. Before you start, assess the height and accessibility of the windows you’ll clean. Consider using an extendable cleaning pole with a squeegee attachment for upper-level windows to reach them safely from the ground.
However, if you need to get closer to the window, it’s advisable to use a sturdy and well-maintained ladder. Ensure the ladder is placed on a flat, stable surface and never overreach while on it. For multi-story homes, hiring a professional with the appropriate equipment and experience may be safer.
Using Appropriate Ladders or Safety Harnesses
Choosing the right ladder is crucial to ensure your safety during home window cleaning. Opt for a tall ladder to reach the window comfortably without the need to stretch or lean dangerously. Extension ladders are excellent for reaching higher windows, while step ladders are ideal for single-story homes.
Always inspect the ladder for any damage or defects before use. Additionally, consider using safety harnesses and fall protection gear when working at heights, especially on upper-level windows. These measures can provide an extra layer of security in case of unexpected accidents.
Wearing Protective Gear (Gloves, Goggles)
Wearing the appropriate protective gear while cleaning your home’s windows is a simple yet effective way to prevent injuries. Start with sturdy gloves that offer a good grip and protect your hands from sharp edges or potential chemical irritants in cleaning solutions. Safety goggles are also essential to shield your eyes from splashes and debris that may dislodge during cleaning.
In some cases, especially when dealing with potentially hazardous substances or mold, wearing a mask can also be a wise choice to protect your respiratory health. Remember, protecting yourself is an integral part of the home window cleaning process, ensuring you achieve spotless windows and maintain your well-being.
In closing, we hope this guide on Home Window Cleaning has empowered you with the knowledge and techniques needed to achieve impeccably clean and streak-free windows for your home. As we’ve seen, the impact of crystal-clear windows on your home’s overall appeal cannot be understated. Remember, your windows are a view of the outside world and a reflection of your home’s cleanliness and care.
So, seize the opportunity to transform your living space with these invaluable tips and tricks. We eagerly await your success stories and any challenges you may face. Please share them in the comments section below, and let’s embark on this window-cleaning journey together. For those who prefer the expertise of professionals or require assistance, consider contacting Freeflo Home Services for a truly exceptional window cleaning experience. Contact us today, and let your windows shine brighter than ever before!

